How to use the thermal palette on Skydio X2
Published: Updated:
Thermal Palette (X2 Color/Thermal Only)
Skydio X2 Color/Thermal offers the ability to select thermal palettes for efficient analysis of your environment. The thermal camera assigns each pixel a unique color or shade based on a relative temperature data point. Changing the thermal palette can help highlight specific warm or cold people, objects, or points of interest for better identification confidence and decision-making.
| White Hot (default) - displays warmer objects in white and cooler objects in black to generate detailed images—well suited for use in urban environments. | 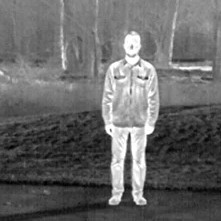 |
| Black Hot - is an inverted White Hot, displaying warmer objects as black and cooler objects as white. |  |
| Rainbow - uses colors to display subtle variations in scenes with low-contrast heat differentials. |  |
| Ironbow - uses color to display heat distribution and thermal anomalies. Warmer objects are presented in lighter colors and colder objects in darker colors. | 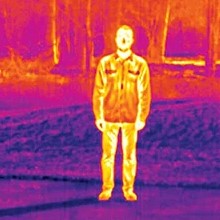 |
Quick Steps
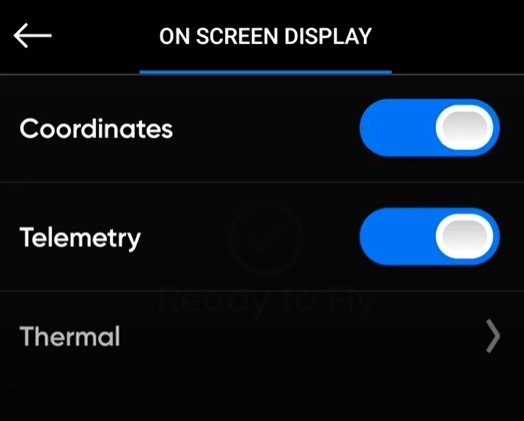
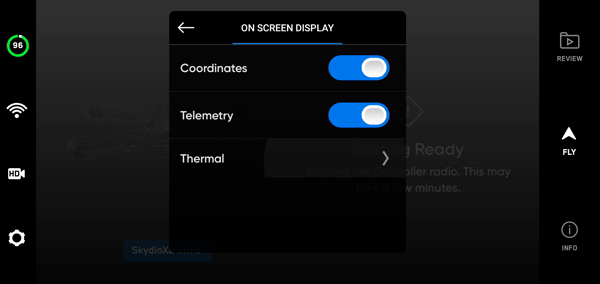
Step 1 - Select the Device settings menu
Step 2 - Select Controller
Step 3 - Select On Screen Display
Step 4 - Select Thermal
Step 5 - Toggle PIP on or off
Step 6 - Select the thermal pallet that suits your environment
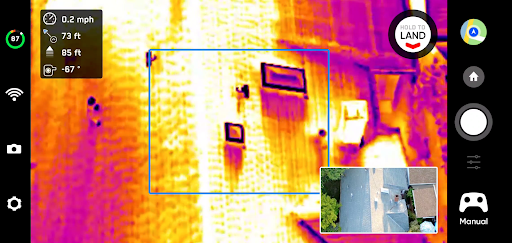
Show Thermal - toggle the display of the thermal camera live feed:
-
- On (default) - displays a live feed from the color camera as well as a picture-in-picture (PIP) feed from the thermal camera using the thermal palette selected.
- Off - only the live feed from the color camera will display
Picture-in-picture (PIP) - select the PIP to toggle between viewing the thermal camera feed full screen and the color camera feed full screen.
[note text="Thermal palette selection persists across flights and power cycles."]
Thermal Camera presets
Automatic Gain Control (AGC) Tuning - With AGC Tuning, the gain, or signal noise, in your thermal image will automatically optimize for the contrast you have selected. Options include:
| Reconnaissance - uses the lowest contrast settings; the temperatures in your image will be represented with a narrow range of colors or shades. |  |
| Low contrast - displays a broader range of color than Reconnaissance allowing for more defined temperature differentiation. | 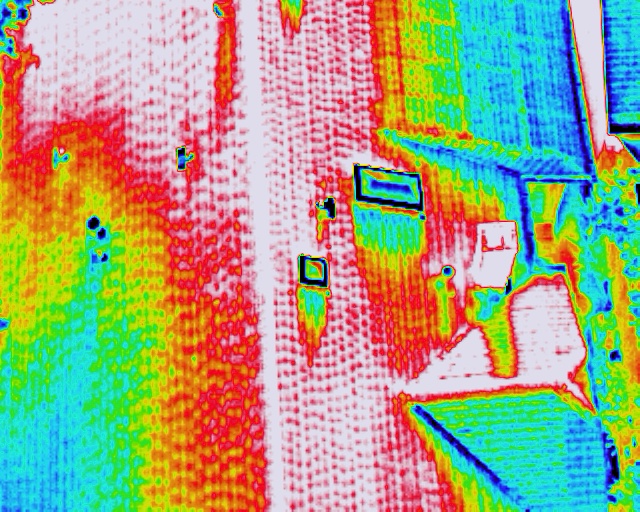 |
| Medium contrast (default) - as you add contrast to your images the resulting temperature variances are represented by more colors, providing greater detail in your thermal imagery. | 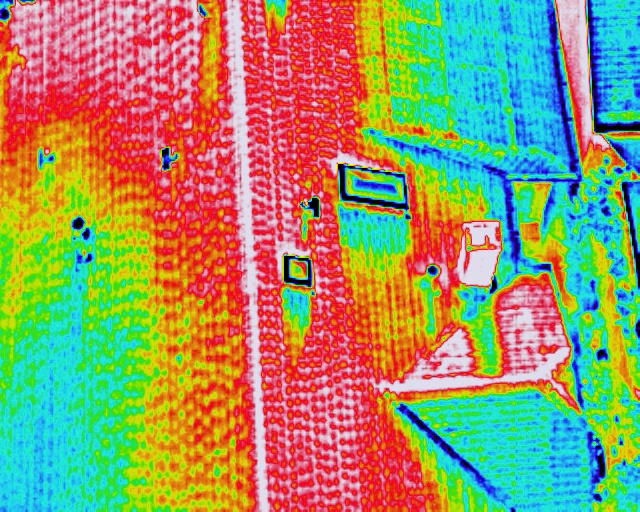 |
| High contrast - displays temperature variances using a wide range of colors, providing the highest level of detail in your thermal imagery. | 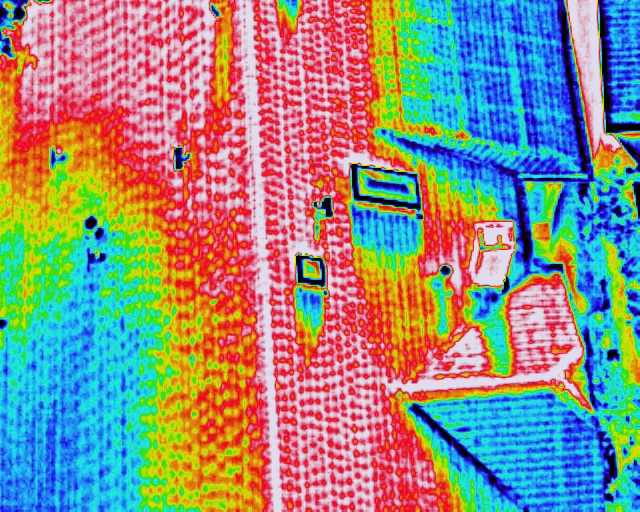 |
|
Region of Interest - select a Region of Interest (ROI) on your thermal image and apply AGC to that specific area. The area inside the ROI will be optimized with AGC, while the area outside the region of interest can still be viewed. Specifying the region of interest is useful in situations when you need to quickly determine thermal irregularities by ignoring sections of a thermal reading that are irrelevant to you. |
|
 |
|
|
Step 1 - Select the Device settings menu Step 2 - Select Controller Step 3 - Select On Screen Display Step 4 - Select Thermal |
 |
|
Step 5 - Select the Region of Interest between 10% - 100% |
|
 |
|
|
Step 6 - Select the thermal pallet Step 7 - Select the AGC Tuning |
 |
Explore More
Explore related articles for additional information
How to Access Skydio X2E Manuals, Checklists, and Guides
Skydio, Inc. A0103
Was this article helpful?