How to Integrate Skydio Cloud with DroneDeploy
Published: Updated:
Sync your 3D Scan media from Skydio Cloud to your DroneDeploy dashboard. DroneDeploy offers a REST-based API integration with Skydio Cloud for seamless post-production modeling of your 3D Scan images. You will need to configure your Skydio Cloud and Media Sync API integration.
[info text="This is available for DroneDeploy Teams and Enterprise subscribers."]
Needed
-
- Skydio Administrative access
- DroneDeploy Administrative access
- Computer with Internet
Quick Steps
| Step 1 - Log into cloud.skydio.com |
| Step 2 - Set up your Skydio Cloud account: Getting Started with Skydio Cloud |
|
Step 3 - Add Wireless Networks
|
|
|
|
For more detailed instructions and advanced wireless network guidelines, visit: |
||
|
Step 4 - Choose media to upload
|
|
|
|
Step 5 - Power on the drone |
||
| Step 6 - Log into the Skydio Controller using your Skydio Cloud organization registered username and password. | ||
|
Step 7 - Sync your Skydio Cloud features
|
|
|
|
Step 8 - Plug in the drone to power
|
||
|
For more detailed instructions visit: How to Use Skydio Cloud Media Sync |
||
|
Step 9 - Generate a Skydio API token by adding the integration to Skydio Cloud:
|
|
|
Step 10 - Copy Token Secret |
|
[info text="Your Skydio API token is only available during the active login session or until the page is refreshed."]
| Step 11 - Log in to your DroneDeploy account | |
|
Step 12 - Enter API token (only required for first-time setup)
After your Skydio API token is validated, you can choose the Skydio 3D Scans to sync to your project. Reach out to DroneDeploy Customer Support if Skydio Sync does not display. |
|
|
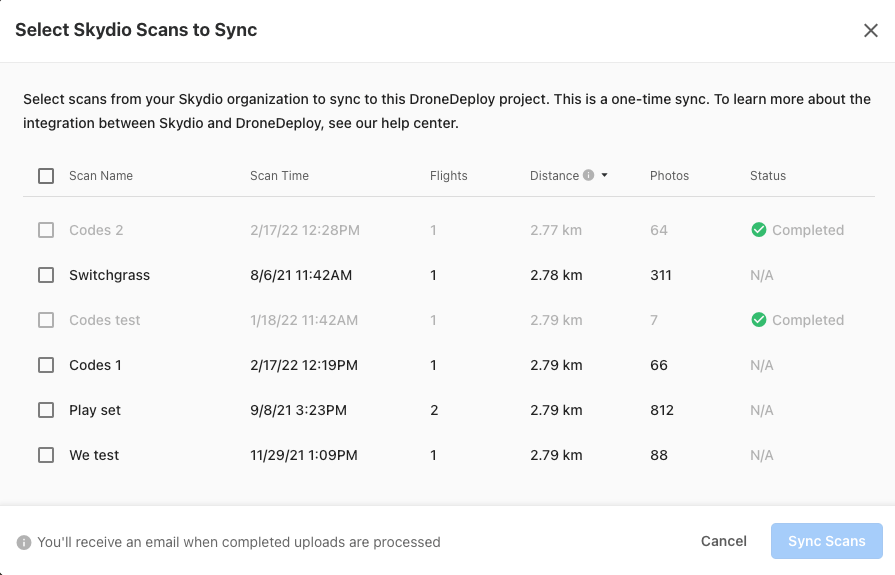
Step 13 - Sync your Skydio scans
if there are Skydio 3D Scans available within a 10 km vicinity of a project, they will be listed here. |
|
|
Step 14 - Select the Skydio 3D Scans that you want to sync to your DroneDeploy project
|
|
[note text="API Tokens should be kept secret! They grant access to your organization's data in Skydio Cloud (media, flights, vehicles, user emails, etc.)."]
Troubleshooting
[accordion heading="Formatting requests to the Skydio API"]
All requests to the Skydio API should contain an Authorization header with your API Token. Requests to the API should be formatted like this:
Bash
Python
curl -X 'GET' \
'https://api.skydio.com/api/v0/flights' \
-H 'accept: application/json' \
-H 'Authorization: <api_token_here>'
[/accordion]
Unable to access Skydio Cloud
Go to cloud.skydio.com
-
- enter your email address
-
enter the verification code sent to your email address
[info text="Ensure that you are logging in to your mobile device with the same email address that has been provisioned on Skydio Cloud."]
Have you set up your Skydio Cloud?
You will need to configure your Skydio Cloud account before you can upload flight telemetry. See Getting Started with Skydio Cloud. Any media captured prior to configuring your Skydio Cloud will not sync.
Is the vehicle claimed in Skydio Cloud?
Vehicles are not automatically associated with an organization, you will need to claim the vehicles that you want in your fleet:
Step 1 - Select Settings
Step 2 - Select Devices
Step 3 - Select Claim Device
Step 4 - Enter vehicle WiFi (eg Skydio2: - xxxx)
The vehicle tab displays a list of associated vehicles ID
[info]You cannot claim a vehicle associated with another organization. You cannot delete a vehicle. If you receive this error message or need to delete a vehicle, contact Skydio Customer Support[/info]
Explore More
For additional information visit:
Getting Started with Skydio Cloud
Skydio, Inc. A0214
Was this article helpful?