How to sync your drone to Skydio Cloud
Published: Updated:
Syncing your Skydio Cloud settings to your Skydio drone allows you to view your Cloud settings in the Enterprise Controller or Enterprise App user interface.
Quick Steps
| Step 1 - Attach the battery to the drone | |
| Step 2 - Power on the drone | |
| Step 3 - Sign in to the controlling device using your Skydio Cloud organization registered user name and password. | |
| Step 4 - Ensure the controlling device is connected to a stable wireless network | |
|
[note]"Do not connect the drone to the controller using USB-C cable when performing the syncing process."[/note] |
|
|
Step 5 - Connect to the drone |
|
|
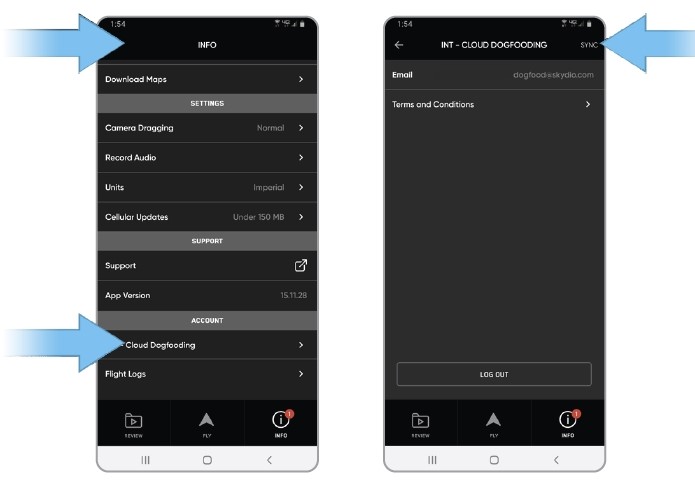
Step 6 - Sync your Skydio Cloud features
|
|
|
You may also force a SYNC
|
 |
|
Cloud settings offer visibility into the licenses you have assigned to your vehicle, features, and the networks you have added in Skydio Cloud. Advanced software licenses and features include:
|
|
|
If you have named your drone in Skydio Cloud the name will appear in the user interface. |
|
Explore More
Explore related articles for additional information
Getting Started with Skydio Cloud
Skydio, Inc. A0369
Was this article helpful?